Bài viết được dịch từ: barbarianmeetscoding.com
Đây là bài thứ 3 trong loạt bài viết: "Bắt đầu với Angular 2 từng bước một". Bạn có thể xem lại các bài viết khác ở đây:
- Bắt đầu với Angular 2 từng bước một: 1 - Component đầu tiên của bạn
- Bắt đầu với Angular 2 từng bước một: 2 - Refactoring thành services
- Bắt đầu với Angular 2 từng bước một: 4 - Routing
- Bắt đầu với Angular 2 từng bước một: 5 - Forms và Validation
- Bắt đầu với Angular 2 từng bước một: 6 - Sử dụng dữ liệu thực với Http
Trong 2 bài viết trước của loạt bài viết này, bạn đã viết component đầu tiên, bạn cũng refactor logic truy cập dữ liệu thành một service và tiêm vào component của mình tận dụng lợi thế của Angular 2 dependency injection.
Trong bài viết này bạn sẽ tạo ra component thứ 2 và bạn cũng sẽ tìm hiểu các khả năng khác nhau của data binding trong Angular 2.
Code mẫu
Bạn có thể tải toàn bộ code mẫu ở GitHub repo.
PersonDetailsComponent
Chúng ta sẽ cập nhật ứng dụng của mình, khi click vào một nhân vật sẽ hiển thị thông tin chi tiết của nhân vật đó.
Bắt đầu bằng cách hiển thị thông tin tiết trực tiếp trong PeopleListComponent và sau đó chúng ta tách nó thành một component riêng là PersonDetailsComponent.
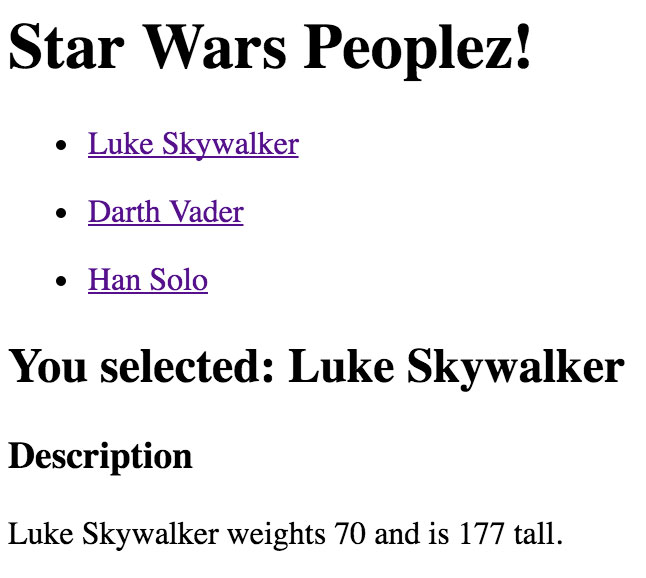
Kết quả cuối cùng sẽ giống như thế này:
PeopleListComponent
PeopleListComponent trông như thế này sau khi kết thúc bài viết trước:
import { Component, OnInit } from '@angular/core';
import { Person } from './person';
import { PeopleService } from './people.service';

@Component({
  selector: 'people-list',
  template: `
  <!-- this is the new syntax for ng-repeat -->
  <ul>
    <li *ngFor="let person of people">
        {{person.name}}
    </li>
  </ul>
  `
})
export class PeopleListComponent implements OnInit{
  people: Person[] = [];
  constructor(private _peopleService : PeopleService){ }

  ngOnInit(){
    this.people = this._peopleService.getAll();
  }
}
Chúng ta nhận một danh sách các nhân vật trong Star Wars từ PeopleService và hiển thị chúng sử dụng *ngFor directive và interpolation binding.
Hiển thị thông tin chi tiết khi click vào một nhân vật
Bây giờ, chúng ta muốn có khả năng lựa chọn một nhân vật bất kỳ khi click chọn. Chúng ta làm điều đó bằng cách nào? Chúng ta sẽ sử dụng Angular 2 (click) event binding.
@Component({
  selector: 'people-list',
  template: `
  <!-- this is the new syntax for ng-repeat -->
  <ul>
    <li *ngFor="let person of people" (click)="selectPerson(person)">
        {{person.name}}
    </li>
  </ul>
  `
})
(click)="selectPerson(person)" event binding nói cho Angular 2 gọi phương thức selectPerson của component bất kỳ khi nào người dùng click vào một phần tử li.
Chúng ta sẽ cập nhật PeopleListComponent:
@Component({
  selector: 'people-list',
  template: `
  <!-- this is the new syntax for ng-repeat -->
  <ul>
    <li *ngFor="let person of people" (click)="selectPerson(person)">
        {{person.name}}
    </li>
  </ul>
  `
})
Bây giờ, bất cứ khi nào người sử dụng click vào một nhân vật trong danh sách, Angular 2 sẽ gọi phương thức selectPerson, nó sẽ cập nhật giá trị của thuộc tính selectedPerson trong PeopleListComponent.
Nếu chúng ta sử dụng thuộc tính selectedPerson trong template để hiển thị thông tin chi tiết của nhân vật, nó sẽ như thế này:
@Component({
  selector: 'people-list',
  template: `
  <!-- this is the new syntax for ng-repeat -->
  <ul>
    <li *ngFor="let person of people" (click)="selectPerson(person)">
        {{person.name}}
    </li>
  </ul>

  <section *ngIf="selectedPerson">
    <h2>You selected:  {{selectedPerson.name}}</h2>
    <h3>Description</h3>
    <p>
       {{selectedPerson.name}} weights  {{selectedPerson.weight}} and is  {{selectedPerson.height}} tall.
    </p>
  </section>
  `
})
Chú ý chúng ta sử dụng *ngIf một structural directive giống như *ngFor cái chỉnh sửa DOM dựa trên biểu thức. Trong trường hợp này, thông tin chi tiết của một nhân vật chỉ hiển thị khi có một nhân vật được chọn.
PeopleListComponent với thông tin chi tiết của nhân vật sẽ trông như thế này:
import { Component, OnInit } from '@angular/core';
import { Person } from './person';
import { PeopleService } from './people.service';

@Component({
  selector: 'people-list',
  template: `
  <!-- this is the new syntax for ng-repeat -->
  <ul>
    <li *ngFor="let person of people">
      <a href="#" (click)="selectPerson(person)">
        {{person.name}}
      </a>
    </li>
  </ul>

  <!-- new syntax for ng-if -->
  <section *ngIf="selectedPerson">
    <h2>You selected:  {{selectedPerson.name}}</h2>
    <h3>Description</h3>
    <p>
       {{selectedPerson.name}} weights  {{selectedPerson.weight}} and is  {{selectedPerson.height}} tall.
    </p>
  </section>
  `
})
export class PeopleListComponent implements OnInit{
  people: Person[] = [];
  selectedPerson: Person;

  constructor(private peopleService : PeopleService){ }

  ngOnInit(){
    this.people = this.peopleService.getAll();
  }

  selectPerson(person: Person){
    this.selectedPerson = person;
  }

}
Angular 2 event binding là gì?
Angular 2 data binding làm việc khác một chút so với Angular 1.
Angular 2 có nhiều tùy chọn binding. Bạn đã thấy interpolation binding liên kết dữ liệu một chiều từ component tới template để hiển thị dữ liệu. Và bây giờ, chúng ta đã học về event binding liên kết dữ liệu theo chiều ngược lại từ template tới component.
Event binding giúp bạn liên kết các phương thức của component trực tiếp với các event của DOM. Không cần custom Angular binding như ng-click, ng-change, ... bạn chỉ cần (click), (change), hoặc bất kỳ event nào bạn muốn.
Tách thông tin chi tiết của nhân vật vào một component riêng
Nếu nhìn đoạn code ở phần trước của PeopleListComponent, bạn có thể cảm thấy có quá nhiều thứ ở đây. Đó là một tín hiệu tốt, bạn cần bắt đầu suy nghĩ về việc chia nhỏ nó.
Hãy tạo PersonDetailsComponent.
Chúng ta sẽ bắt đầu bằng việc tạo file person-details.component.ts. Nội dung file sẽ như thế này:
import { Component } from '@angular/core';
import { Person } from './person';

@Component({
  selector: 'person-details',
  template: `
  <!-- new syntax for ng-if -->
  <section *ngIf="person">
    <h2>You selected:  {{person.name}}  </h2>
    <h3>Description</h3>
    <p>
       {{person.name}}  weights  {{person.weight}} and is  {{person.height}} tall.
    </p>
  </section>
  `
})
export class PersonDetailsComponent {
  person : Person;
}
Bây giờ chúng ta có một component biểu diễn thông tin chi tiết của nhân vật và có thể tái sử dụng trong các component khác của ứng dụng. Nhưng làm thế nào chúng ta có thể gửi dữ liệu tới thuộc tính person của component PersonDetailsComponent?
Chúng ta sử dụng Input decorator:
import { Component, Input } from '@angular/core';

export class PersonDetailsComponent {
  @Input() person : Person;
}
Điều này sẽ đánh dấu thuộc tính person như một đầu vào của PersonDetailsComponent và sẽ cho phép các component khác gửi dữ liệu tới component này. Bằng cách nào? Bằng cách sử dụng Angular 2 property binding giống như thế này:
<people-details [person]="selectedPerson"></people-details>Bây giờ chúng ta sẽ cập nhật PeopleListComponent để sử dụng component mới này. Nhớ là, chúng ta cần thêm component mới tới app.module.ts để ứng dụng của chúng ta biết nó. Chúng bắt đầu bằng cách import component từ module của nó:
import { PersonDetailsComponent } from './person-details.component';Sau đó thêm thuộc tính declarations của decorator NgModule trong app.modules.ts:
@NgModule({
  imports: [ BrowserModule ],
  declarations: [ AppComponent, PeopleListComponent, PersonDetailsComponent],
  bootstrap: [ AppComponent ]
})
export class AppModule { }
Và sau đó, chúng ta có thể sử dụng nó trong template của PeopleListComponent:
<!-- this is the new syntax for ng-repeat -->
<ul>
  <li *ngFor="let person of people">
    <a href="#" (click)="selectPerson(person)"> {{person.name}}  </a>
  </li>
</ul>
<person-details [person]="selectedPerson"></person-details>

PeopleListComponent sẽ trông như thế này:

import { Component, OnInit } from '@angular/core';
import { Person } from './person';
import { PeopleService } from './people.service';

@Component({
  selector: 'people-list',
  template: `
  <!-- this is the new syntax for ng-repeat -->
  <ul>
    <li *ngFor="let person of people">
      <a href="#" (click)="selectPerson(person)"> {{person.name}}  </a>
    </li>
  </ul>
  <person-details [person]="selectedPerson"></person-details>
  `
})
export class PeopleListComponent implements OnInit{
  people: Person[] = [];
  selectedPerson: Person;

  constructor(private peopleService : PeopleService){ }

  ngOnInit(){
    this.people = this.peopleService.getAll();
  }

  selectPerson(person: Person){
    this.selectedPerson = person;
  }

}
Bạn đã hoàn thành. Nếu bạn gõ lệnh npm start để start server. Bạn có thể thấy, bất cứ khi nào click vào một nhân vật, thông tin chi tiết về nhân vật đó sẽ hiển thị.
Angular 2 property binding là gì?
Angular 2 property binding giống như đảo ngược của event binding, chúng cung cấp một cách liên kết dữ liệu một chiều giữa component và template của bạn.
Chúng cho phép liên kết các thuộc tính custom khi liên kết giữa các component như chúng ta đã làm ở phần trên.
Bạn muốn đọc nhiều hơn về Angular 2 data binding?
- Angular 2 Basics: Template Syntax
- Angular 2 Cheetsheet
- Change Detection in Angular 2
- Angular 2 Change Detection
Kết luận
Bạn đã tạo ra 2 component, đã học nhiều về cú pháp Angular 2 template với interpolation, event binding, property binding, *ngFor, * ngIf, bạn cũng đã tạo ra service đầu tiên và tiêm nó vào component sử dụng Angular 2 DI. Hãy suy nghĩ về tất cả những thứ bạn đã làm để xây dựng ứng dụng Angular 2.
Phần tiếp theo sẽ là Routing.
Bình luận