Hôm nay mình sẽ hưỡng dẫn các bạn làm App PokemonGo dựa trên 30 dự án mẫu mà mình đã được học.
https://github.com/soapyigu/Swift-30-Projects/tree/master/Project%2007%20-%20PokedexGo
App hiển thị danh sách các Pokemon và hiển thị chi tiết nội dung của Pokemon đó
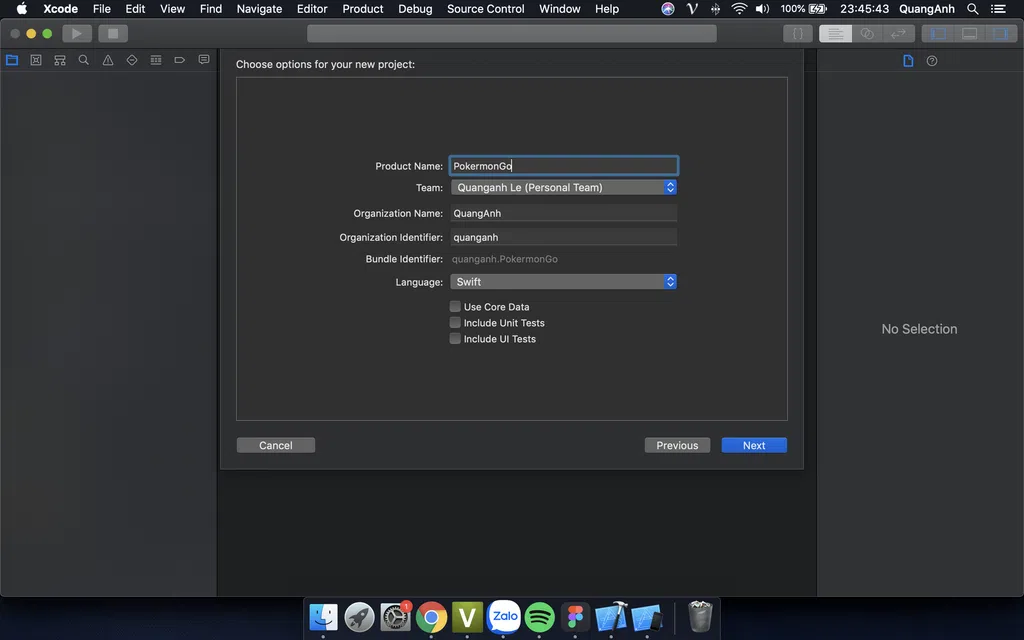
B1: Khởi tạo xcode và đặt tên cho project
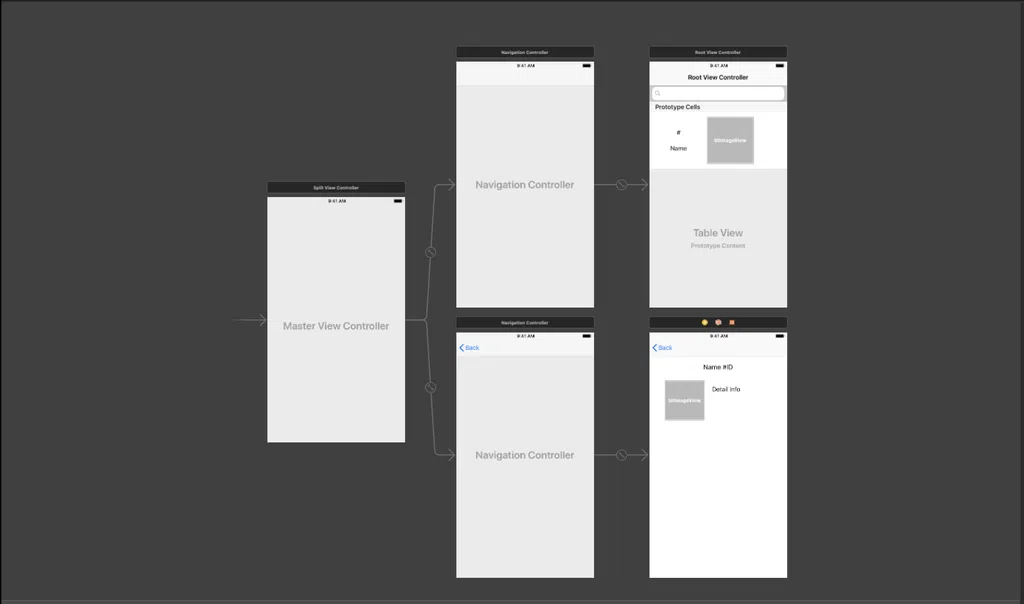
Thiết lập hai màn hình, một màn hình để hiển thị danh dách pokemon và màn hình còn lại để hiển thị nội dung chi tiết pokemon mà mình đã chọn
Ở màn hình danh sách pokemon chúng ta kế thừa UITableview và đặt thêm hai thuộc tính đó chính là delegate và dataSource. Custom lại view sao cho hiển thị được ID, Tên và hình ảnh. Thêm một cái UISearchBar để chúng ta có thể tìm kiếm được tên pokemon
Màn hình còn lại chúng ta customView như màn hình danh sách nhưng không kế thừa UITableView và UISearchBar
B3: Tạofile PokemonConstants.swift. Trong file này chúng ta tạo một mảng pokemons chứa các thuộc tính của nó
let pokemons = [
  Pokemon(name: "妙蛙种子", id: 1,
    detailInfo: "妙蛙种子经常在阳光下酣睡。它背上有个种子,通过吸收阳光渐渐长大。",
    type: [PokeType.grass, PokeType.poison],
    weak: [PokeType.fire, PokeType.flying, PokeType.ice, PokeType.psychic],
    pokeImgUrl: "http://assets.pokemon.com/assets/cms2/img/pokedex/full/001.png"),
B4: Tạo lớp Pokemon kiểu dữ liệu là NSObject, chúng ta tạo một file Pokemon.swift để sao cho dễ quản lý đối tượng hơn
class Pokemon: NSObject {
  let name: String
  let id: Int
  let detailInfo: String
  let type: [PokeType]
  let weak: [PokeType]
  let pokeImgUrl: String
Khởi tạo đối tượng cho lớp Pokemon
init(name: String, id: Int, detailInfo: String, type: [PokeType], weak: [PokeType], pokeImgUrl: String) {
    self.name = name
    self.id = id
    self.detailInfo = detailInfo
    self.type = type
    self.weak = weak
    self.pokeImgUrl = pokeImgUrl
  }
Nếu bạn làm việc với scroll direction, bài toán đặt ra là bạn cần phải xác định được chiều scroll.Trong tình huống đó thì enum sẽ là sự lựa chọn hoàn hảo.
enum PokeType {
  case normal
  case fire
  case water
  case electric
  case grass
  case ice
  case fighting
  case poison
  case ground
  case flying
  case psychic
  case bug
  case rock
  case ghost
  case dragon
  case dark
  case steel
  case fairy
}
B5: Ở màn MasterViewController.swift ta thêm hai thư viện RxSwift và RxSwift
import RxSwift
import RxCocoa
Nếu các bạn chưa biết cài thư viện như thế nào thì hãy xem tại đây
RxSwift giúp công việc của bạn trở nên đơn giản hơn. Thay cho notifications, một đối tượng khó để test, ta có thể sử dụng signals. Thay cho delegates, thứ tốn rất nhiều code, ta có thể viết blocks và bỏ đi switches/ifs lồng nhau. Ta còn có thể sử dụng KVO, IBActions, filters, MVVM và nhiều tiện ích khác được hỗ trợ mượt mà trong RxSwift. Bạn có thể tìm hiểu thêm về RxSwift tại đây
RxCocoa là một thư viện được xây dựng trên nền tảng là RxSwift và nó cũng chính là một phần của RxSwift.
RxCocoa thêm các phần mở rộng (extension) vào các thành phần UI của iOS giúp cho chúng ta có thể subscribe để lắng nghe các sự kiện đến từ UI.
Ví dụ: Để lắng nghe sự kiện ON/OFF từ một UISwicth, chúng ta có thể subscribe thông qua phần mở rộng được cung cấp từ RxCocoa đó là .rx.isOn.
B6: Định nghĩa một đối tượng mới cho PokemonSelectionDelegate kế thừa từ class Pokemon
protocol PokemonSelectionDelegate: class {
  func pokemonSelected(_ newPokemon: Pokemon)
}
Ánh xạ UISearchBar để sử dụng
Tạo biến disposeBag
fileprivate let disposeBag = DisposeBag()fileprivate là 1 access control giới hạn trong 1 file, thường dùng cho extension
Gán delegate và dataSource ở trong table view
weak var delegate: PokemonSelectionDelegate?
//  UITableViewDelegate
  override func tableView(_ tableView: UITableView, heightForRowAt indexPath: IndexPath) -> CGFloat {
    return 140
  }

  override func tableView(_ tableView: UITableView, didSelectRowAt indexPath: IndexPath) {
    let pokemon = self.filteredPokemons[(indexPath as NSIndexPath).row]

    delegate?.pokemonSelected(pokemon)

    if let detailViewController = self.delegate as? DetailViewController {
      splitViewController?.showDetailViewController(detailViewController.navigationController!, sender: nil)
    }
  }

  // UITableViewDataSource
  override func numberOfSections(in tableView: UITableView) -> Int {
    return 1
  }

  override func tableView(_ tableView: UITableView, numberOfRowsInSection section: Int) -> Int {
    return filteredPokemons.count
  }

  override func tableView(_ tableView: UITableView, cellForRowAt indexPath: IndexPath) -> UITableViewCell {
    let identifier = "Cell"

    let cell = tableView.dequeueReusableCell(withIdentifier: identifier, for: indexPath) as! MasterTableViewCell
    let pokemon = filteredPokemons[(indexPath as NSIndexPath).row]

    cell.awakeFromNib(pokemon.id, name: pokemon.name, pokeImageUrl: pokemon.pokeImgUrl)

    return cell
  }
Việc sử dụng Weak, liên quan đến việc quản lý bộ nhớ trong Swift gọi là Automatic Reference Counting (ARC) . Định nghĩa trong Khoa học máy tính thì Reference Counting là kĩ thuật lưu lại số tham chiếu, con trỏ, hoặc sử lý liên quan đến resource như là đối tương, block hoặc bộ nhớ. Nói ngắn gọn, ARC giúp bạn lưu các tham chiếu vào trong bộ nhớ và giúp giải thoát nó đi khi không được dùng nữa.
Khởi tạo fucn setupUI
fileprivate func setupUI() {
    self.title = "精灵列表"

    definesPresentationContext = true

    searchBar
      .rx.text
      .throttle(0.5, scheduler: MainScheduler.instance)
      .subscribe(
        onNext: { [unowned self] query in
          if query?.characters.count == 0 {
            self.filteredPokemons = self.pokemons
          } else {
            self.filteredPokemons = self.pokemons.filter{ $0.name.hasPrefix(query!) }
          }
          self.tableView.reloadData()
        })
      .addDisposableTo(disposeBag)
  }
Đoạn code này có nghĩa khi bạn tìm kiếm từ khóa của pokemon thì nó sẽ lọc ra những pokemon có từ khóa mà bạn nhập vào nếu mà không có thì nó sẽ k hiển thị
B7: Tạo class MasterTableViewCell để hiển thị view của danh sách pokemon
class MasterTableViewCell: UITableViewCell {
@IBOutlet weak var idLabel: UILabel!
@IBOutlet weak var nameLabel: UILabel!
@IBOutlet weak var pokeImageView: UIImageView!
fileprivate var indicator: UIActivityIndicatorView!
func awakeFromNib(_ id: Int, name: String, pokeImageUrl: String) {
super.awakeFromNib()
setupUI(id, name: name)
setupNotification(pokeImageUrl)
}
deinit {
pokeImageView.removeObserver(self, forKeyPath: "image")
}
override func setSelected(_ selected: Bool, animated: Bool) {
super.setSelected(selected, animated: animated)
}
fileprivate func setupUI(_ id: Int, name: String) {
idLabel.text = NSString(format: "#%03d", id) as String
nameLabel.text = name
pokeImageView.image = UIImage(named: "default_img")
indicator = UIActivityIndicatorView()
indicator.center = CGPoint(x: pokeImageView.bounds.midX, y: pokeImageView.bounds.midY)
indicator.activityIndicatorViewStyle = .whiteLarge
indicator.startAnimating()
pokeImageView.addSubview(indicator)
pokeImageView.addObserver(self, forKeyPath: "image", options: [], context: nil)
}
fileprivate func setupNotification(_ pokeImageUrl: String) {
NotificationCenter.default.post(name: Notification.Name(rawValue: downloadImageNotification), object: self, userInfo: ["pokeImageView":pokeImageView, "pokeImageUrl" : pokeImageUrl])
}
override func observeValue(forKeyPath keyPath: String?, of object: Any?, change: [NSKeyValueChangeKey : Any]?, context: UnsafeMutableRawPointer?) {
if keyPath == "image" {
indicator.stopAnimating()
}
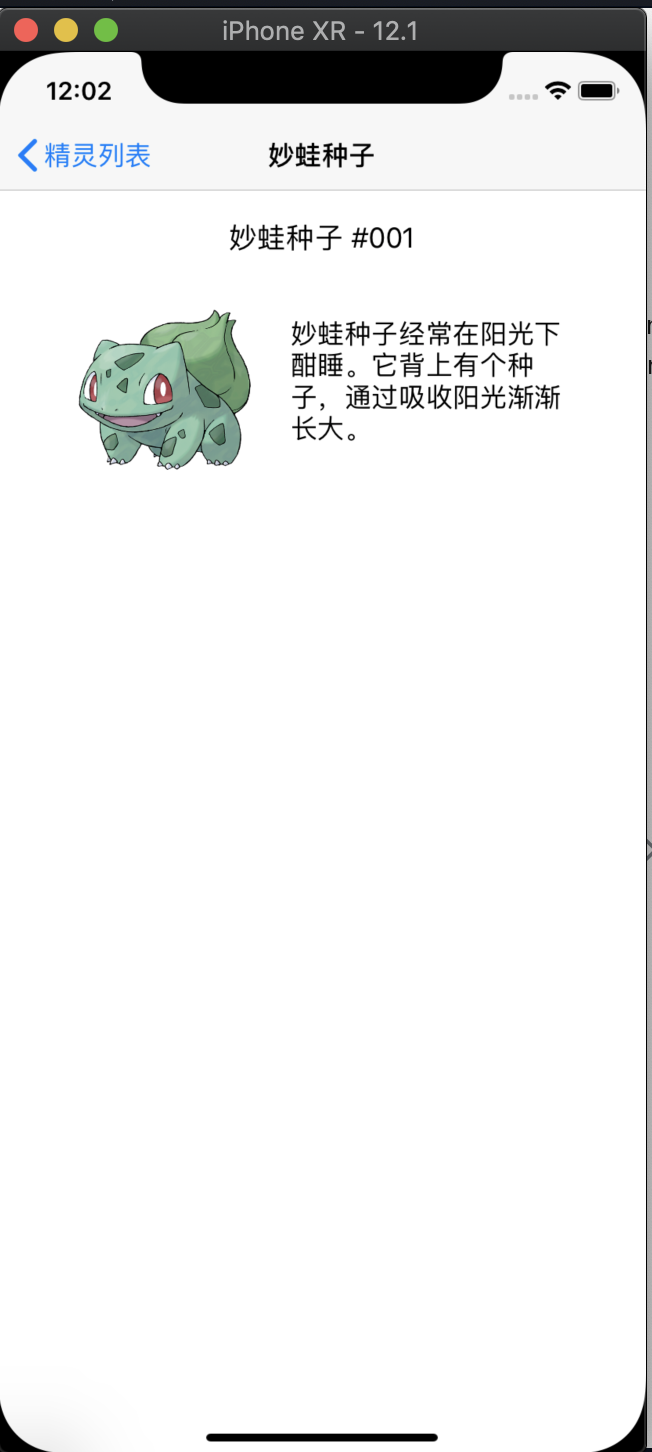
}B9: Tạo màn hình chi tiết của danh sách pokemon
class DetailViewController: UIViewController {
  // MARK: - IBOutlets
  @IBOutlet weak var nameIDLabel: UILabel!
  @IBOutlet weak var pokeImageView: UIImageView!
  @IBOutlet weak var pokeInfoLabel: UILabel!

  var pokemon: Pokemon! {
    didSet (newPokemon) {
      self.refreshUI()
    }
  }

  override func viewDidLoad() {
    refreshUI()
    super.viewDidLoad()

  }

  func refreshUI() {
    nameIDLabel?.text = pokemon.name + (pokemon.id < 10 ? " #00\(pokemon.id)" : pokemon.id < 100 ? " #0\(pokemon.id)" : " #\(pokemon.id)")
    pokeImageView?.image = LibraryAPI.sharedInstance.downloadImg(pokemon.pokeImgUrl)
    pokeInfoLabel?.text = pokemon.detailInfo

    self.title = pokemon.name
  }
}

extension DetailViewController: PokemonSelectionDelegate {
  func pokemonSelected(_ newPokemon: Pokemon) {
    pokemon = newPokemon
  }
}
B10: Khởi tạo class LibraryAPI để lắng nghe sự kiện xem nó có trả về hình ảnh ở trên server không
class LibraryAPI: NSObject {
  static let sharedInstance = LibraryAPI()
  let persistencyManager = PersistencyManager()


  deinit {
    NotificationCenter.default.removeObserver(self)
  }

  func getPokemons() -> [Pokemon] {
    return pokemons
  }

  func downloadImg(_ url: String) -> (UIImage) {
    let aUrl = URL(string: url)
    let data = try? Data(contentsOf: aUrl!)
    let image = UIImage(data: data!)
    return image!
  }

  func downloadImage(_ notification: Notification) {
    // retrieve info from notification
    let userInfo = (notification as NSNotification).userInfo as! [String: AnyObject]
    let pokeImageView = userInfo["pokeImageView"] as! UIImageView?
    let pokeImageUrl = userInfo["pokeImageUrl"] as! String

    if let imageViewUnWrapped = pokeImageView {
      imageViewUnWrapped.image = persistencyManager.getImage(URL(string: pokeImageUrl)!.lastPathComponent)
      if imageViewUnWrapped.image == nil {

        DispatchQueue.global().async {
          let downloadedImage = self.downloadImg(pokeImageUrl as String)
          DispatchQueue.main.async {
            imageViewUnWrapped.image = downloadedImage
            self.persistencyManager.saveImage(downloadedImage, filename: URL(string: pokeImageUrl)!.lastPathComponent)
          }
        }
      }
    }
  }
}
Chạy và hiển thị kết quả
Bình luận